
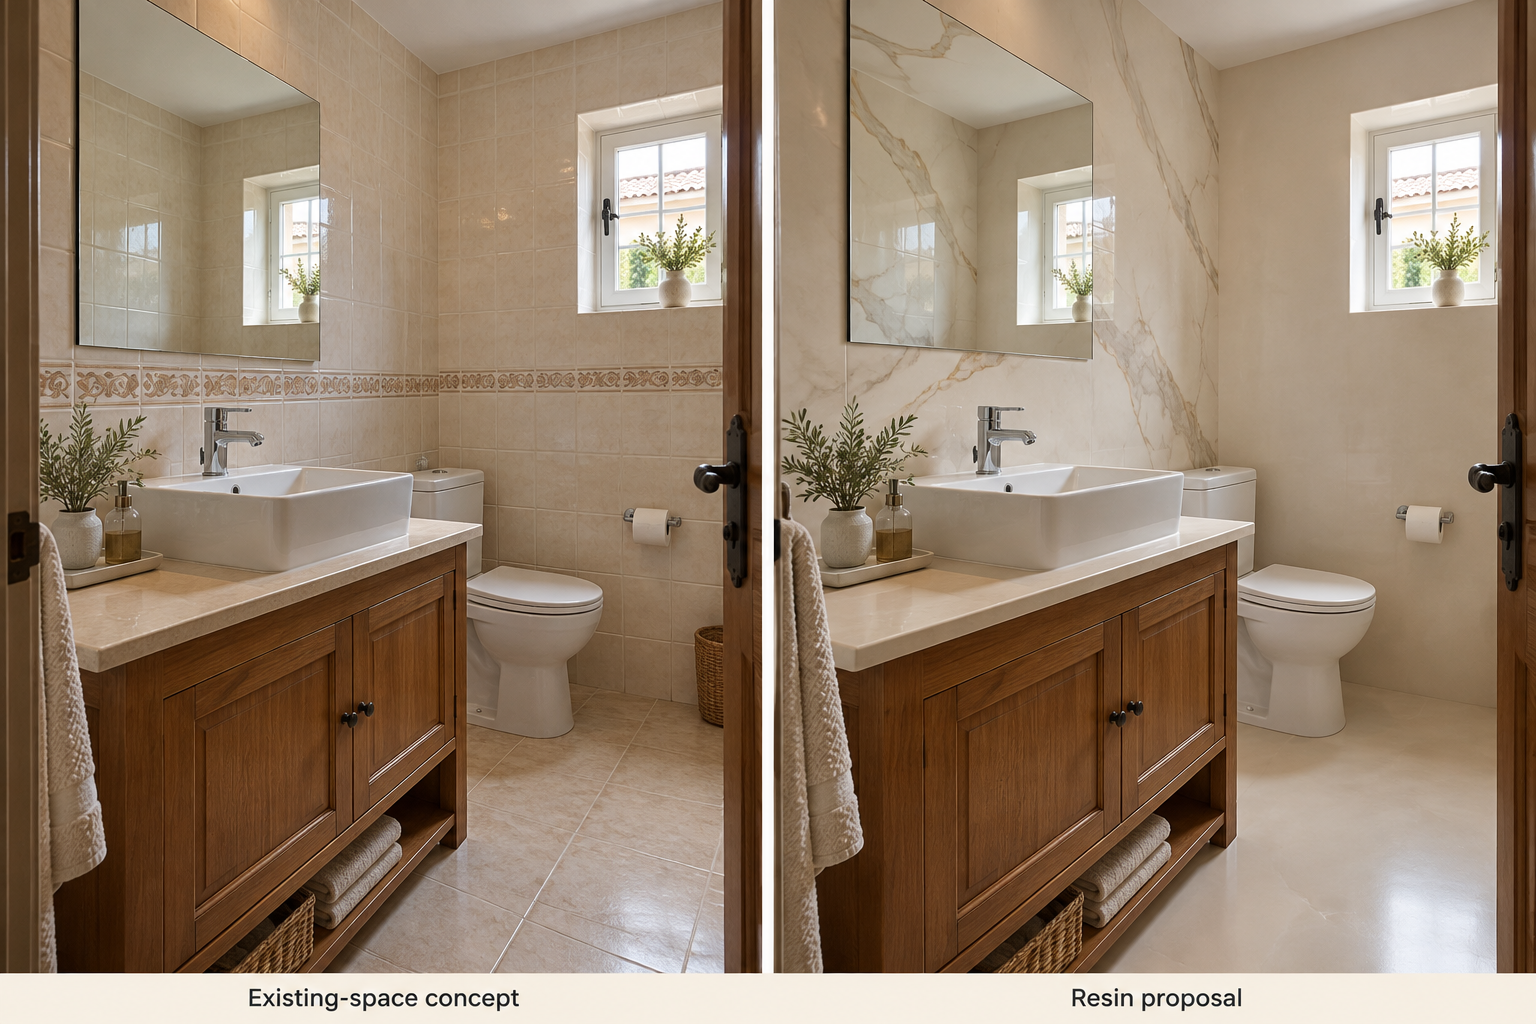
Using Before-and-After Concepts to Plan a Resin Renovation
How consistent viewpoints, retained fixtures and clear concept labels make before-and-after comparisons useful for planning your renovation. Cover: a bathroom design study, not a completed installation.
A useful comparison keeps the room recognisable
When the camera, furniture and lighting all change, it becomes difficult to judge what a new surface actually contributes. A helpful design comparison keeps the architecture and viewpoint consistent. The proposed surface then becomes the meaningful difference.
Start with what you intend to keep
In a bathroom, that might be a vanity, shower screen and window. In a living room, it could be the TV, cabinet and floor. In an outdoor space, the gate, drainage and planting may remain. Tell the designer which elements are fixed before a proposal is developed.
Separate an idea from evidence of execution
A concept visualisation shows a possible design direction. It cannot verify installation quality, system performance or the condition of the hidden substrate. A completed-project case study has a different purpose: it documents a real scope of work and its actual outcome. Look for clear labels distinguishing a design concept from a completed project.
Look closely at the ordinary details
Edges, sockets, thresholds, fittings and shadows make a room believable. They also raise useful project questions. Where does a wall panel end? How is the cabinet junction resolved? What happens at a shower drain? A design study should help identify these questions rather than hide them.
Bring the concept back to materials
Colour and reflection vary with screens and lighting. Once the visual direction is clear, compare physical samples with the finishes in the room. The chosen coating, preparation and practical details still need to be confirmed for the application.
Create your own brief
Send clear photographs from a few positions, dimensions and a note of what stays. Include an image showing the wider room, not only the surface to be changed. A concise brief lets the design focus on a renovation that belongs to your space.
Explore bathroom resin renovation and resin feature walls, browse our labelled design studies, or discuss your space.
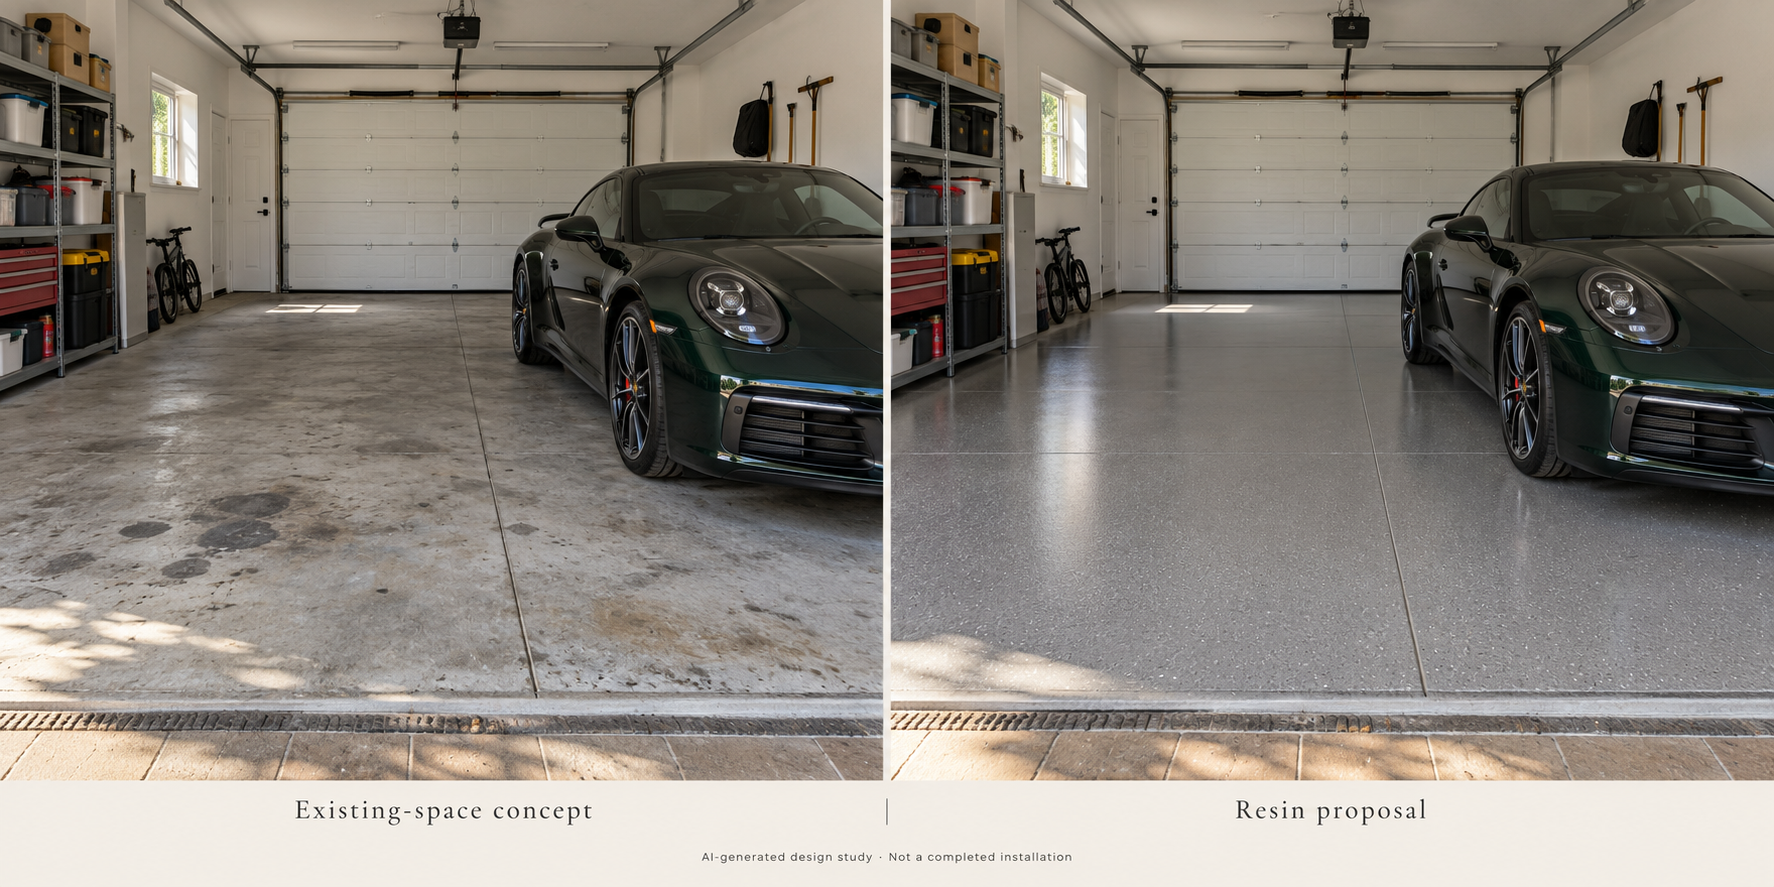
Choosing a Garage Floor: Solid Colour, Flake or Quartz
Compare solid-colour, decorative flake and quartz finishes, with practical questions about preparation, texture, cleaning and returning vehicles to the garage. Cover: a garage design study, not a completed installation.
Choose the use before the appearance
A garage can be a parking space, store, workshop or part of the arrival experience of a home. Describe all those uses before selecting a finish. Include the vehicles, tools, cleaning products and spills the floor is expected to encounter.
Solid colour
A restrained solid-colour finish can make the space feel ordered and easy to read. The result depends on preparation and the specified coating system. Look at the colour under the existing lighting and consider the visual contrast with walls, doors and storage.
Decorative flake
Flakes introduce a patterned appearance. The scale, colours and density change the look substantially. Review a physical sample of the complete finished system rather than only loose flakes or a catalogue photograph. Ask which resin and topcoat are included in the proposal.
Quartz
Quartz finishes can introduce aggregate texture and a different visual character. Ask how the selected texture relates to ramps, wet tyres and cleaning. A more textured appearance alone does not establish a universal slip rating; the chosen system and its intended use need to be assessed.
Read beyond the finish name
Moisture assessment, existing paint removal, contamination, cracks and substrate condition can affect the work. A quotation that describes only the decorative layer may be incomplete. Confirm the preparation, repairs, junctions and exclusions so competing proposals can be compared fairly.
Plan the interruption
Before work starts, establish where vehicles and stored items will go. Confirm when people can walk on the surface and when cars can return. Keep the handover care instructions for the actual system, including suitable cleaning products and how to deal with spills.
Your starting point
Send wide photographs and close-ups of the floor, dimensions, location and the way you use the garage. Add one or two visual references. Resiluxo can help turn that information into a coherent design brief and an agreed scope.
Explore garage resin flooring on the Costa del Sol and epoxy flooring in Marbella, or start your garage project.
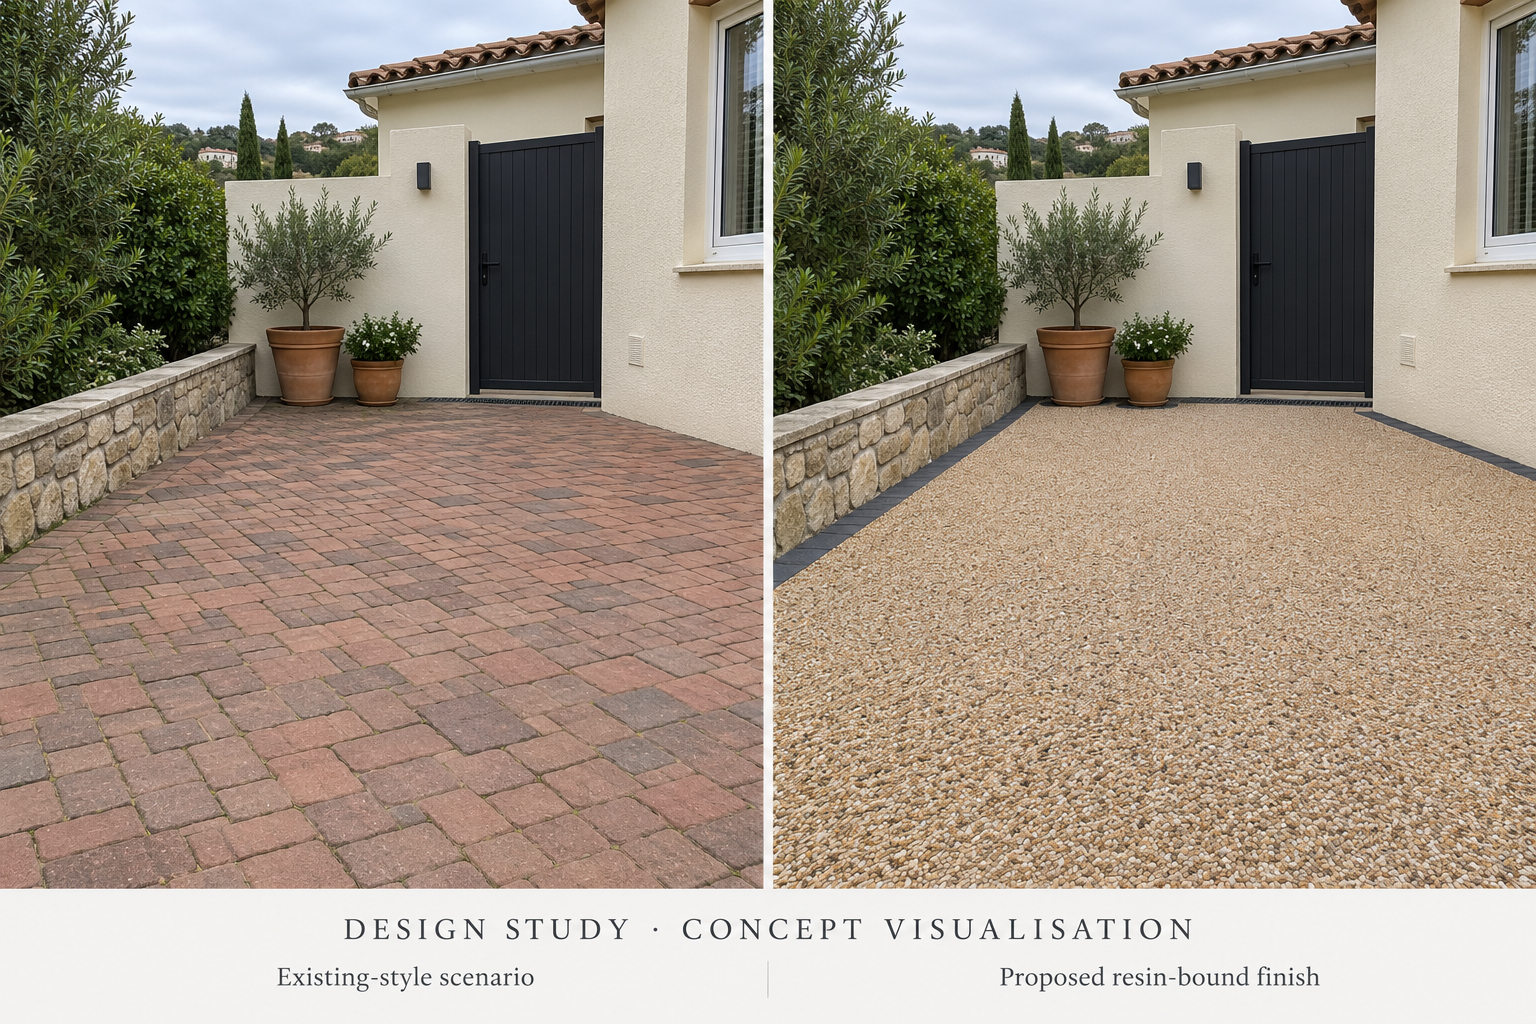
Planning an Outdoor Resin Surface on the Costa del Sol
A considered approach to driveways, terraces and paths: boundaries, drainage, material samples and quotation details. Cover: an outdoor resin-bound design concept, not a completed installation.
Begin at the boundaries
A new outdoor surface meets a building, a gate, planting, an existing path or a neighbouring finish. Photograph those boundaries first. Door thresholds, gate clearances, step edges and drain covers are small details that can change the scope of the work.
Describe how the area is used
Note where cars turn or brake and whether delivery vehicles use the entrance. For a terrace, explain where furniture stands and how the space is washed. Around a pool, discuss wet use and the intended cleaning regime. The finish should be selected for that brief, with the relevant slip-performance information.
Choose colour with the property
A warm aggregate blend can connect terracotta, stone and cream render. A cooler blend may work with dark metal and contemporary detailing. These are design directions, not rules. View a sample beside the actual materials before committing, and decide whether an edging detail should contrast or disappear.
Be precise about sunlight and texture
Exposed surfaces need a binder and system suited to the conditions. Ask which exact product has been specified rather than assuming that every resin product performs the same way. Review texture, cleaning and the intended use together.
Make the quotation useful
Ask for a written description of preparation, repairs, drainage, edging, finish and exclusions. Agree how access to the property will work while the surface is unavailable. Application and return-to-use times should be confirmed for the product and conditions, not inferred from a general promotional promise.
Prepare a concise brief
Include location, approximate area, photographs, current material, intended use and desired appearance. Mention known movement, dampness or previous repairs. An honest brief helps the design and installation team establish a realistic scope from the start.
Explore resin-bound finishes for Marbella and the Costa del Sol, read our resin-bound versus resin-bonded guide, or discuss your outdoor project.
Resin Bound or Resin Bonded? Start with the Use
Two similar names, different constructions. Understand drainage, preparation and the questions to ask before choosing a finish for your driveway, terrace or path. Cover: an outdoor resin-bound design concept, not a completed installation.
Two similar names, different constructions
Resin-bound surfacing is made by mixing aggregate with a resin binder before the mixture is placed. Resin-bonded surfacing uses aggregate scattered onto a resin layer. They should not be treated as interchangeable products simply because both combine stone and resin.
Ask what the surface needs to do
Start with the intended use: a villa driveway, a garden path, a terrace and a pool edge have different briefs. Note vehicle movements, slopes, thresholds and areas that become wet. Explain how the space is cleaned and where leaves or sediment collect. This gives an installer a more useful starting point than a colour photograph alone.
Follow the water
An open resin-bound surface may let water pass through it. What happens next depends on the rest of the construction. If the base is impermeable, the water needs a designed route to drainage. A porous decorative finish is not a guarantee that the whole area will drain correctly. Resin-bonded surfacing is generally non-permeable and needs appropriate surface-water management.
Review the sample in context
Choose the stone blend beside the wall render, gates and planting. Look at it from both close range and the normal approach to the property. Ask to see the exact proposed binder and aggregate combination. A photograph cannot reliably show the grain size, texture or colour under your own light.
Read the quotation as a system
A clear quotation identifies the base assessment, preparation, repair or replacement, edging, drainage, specified finish and return-to-use programme. It should explain what is included and what is excluded. Avoid comparing prices that describe different scopes.
Bring the right information
Send a wide photograph of the area, close-ups of damage, approximate dimensions and the location of drains and thresholds. Add photographs after rain if standing water is a concern. Resiluxo can use that brief to develop the visual direction and coordinate the next stage of assessment.
Explore our outdoor resin-bound surfacing in Marbella and the Costa del Sol, or start a conversation about your project.
Further reading: Resin Mill’s guide to resin-bound and resin-bonded construction. Final specification depends on the selected system and site assessment.
Resin Bathrooms: A Guide to Floors, Walls & Renovation
Planning a resin bathroom? Explore design ideas, existing-tile assessment, waterproofing, wet-use suitability and the details to include in a renovation brief. Cover image: a bathroom design study showing a proposed resin finish.
A bathroom renovation can begin with a new material direction. Warm cream, quiet mineral tones or a marble-inspired feature wall can change how an existing room feels. Resin offers possibilities for a continuous-looking surface, provided the complete system is suitable for the substrate and the way the bathroom will be used.
For a project in Marbella or the Costa del Sol, begin with two questions: what would you like to change visually, and what needs to be resolved beneath the finish?
Choose the atmosphere before the pattern
Start with the elements you intend to keep: the vanity, mirror, brassware and natural light. A warm ivory floor can sit quietly beside timber. Fine champagne veining can give one wall a focal point. A more expressive marble effect works best when the surrounding palette allows it room.
Look at samples beside your existing materials, in daylight and under the bathroom lighting. Discuss the scale and direction of the veining as well as colour. A small sample helps establish the palette; a visual proposal helps you consider the composition across the whole room.
Explore our bathroom design studies →
Can resin be applied over existing bathroom tiles?
Sometimes an existing tiled surface can form part of a renovation proposal, but suitability cannot be decided from a photograph alone. The assessment should consider tile adhesion, cracks, moisture, previous coatings and the condition of the underlying surface. Loose or unsuitable finishes may need to be removed.
Preparation is a separate part of the project, not simply a choice of colour. FeRFA’s surface preparation guidance explains why the preparation method must suit the substrate and the selected resin system. Ask how grout lines, transitions and existing movement joints will be dealt with before agreeing the finish.
Plan waterproofing as a complete system
A decorative resin finish should never be assumed to make an entire bathroom watertight. Shower zones require a compatible waterproofing strategy, with particular attention to drains, corners, pipe penetrations and wall-to-floor junctions.
Sika’s wet-room guidance illustrates the importance of the substrate, drainage slopes and sealed transitions. Its examples include systems finished with tiles; they are a useful reference for waterproofing principles, not approval for an unspecified decorative resin coating. The proposed build-up must be checked for the specific project.
Match the surface to wet use
A wall and a shower floor have different requirements. Do not choose a floor by gloss level or a photograph alone. Ask for evidence that the proposed finish suits the expected wet conditions, and discuss drainage and cleaning together.
FeRFA’s slip-resistance guidance treats surface performance, contamination, drainage and cleaning as connected considerations. The practical result is a specification based on use, rather than a blanket “non-slip” claim.
What affects the quotation and programme?
Two bathrooms with the same floor area can involve very different work. Ask for a proposal that separates surface preparation, repairs, waterproofing, decorative finish, edge details and any plumbing or removal work. Confirm what is included around the shower, vanity and door threshold.
The programme should distinguish preparation and application from the period before the bathroom can return to normal wet use. FeRFA’s system selection guide includes the substrate, intended use, cleaning exposure and available curing time among the factors to consider. A project-specific assessment is more useful than a universal price per square metre or a fixed completion promise.
Prepare a useful bathroom brief
Photographs of the whole room, existing tiles, corners and shower area.
Your location and approximate floor and wall dimensions.
The fittings you plan to retain or replace.
Any known leaks, loose tiles or previous repairs.
Your preferred palette and a realistic window for the works.
At handover, request the care instructions for the selected finish, including suitable cleaning products and when wet use can resume.
Start with your space
Our bathroom images are design concepts showing proposed finishes. They can help you explain the atmosphere you want to create. Tell Resiluxo about your bathroom to discuss the next step, or explore our resin surface services.
Resin Floors for Car Parks: Planning a Refurbishment in Phases
How phased access, preparation and system selection shape a car park refurbishment, with a documented Sika example and practical questions for developers in Marbella and the Costa del Sol.
A successful car park refurbishment begins with how the building operates: vehicle routes, pedestrian access, drainage and the areas that must remain available. The finish is one part of that brief.
A documented example: Merrion Centre, Leeds
Sika describes the refurbishment of a 950-space multi-storey car park, with work organised one level at a time during a 48-week programme so the facility could remain operational. Different systems were specified for intermediate and exposed decks. The works also involved concrete repair, corrosion management and structural strengthening.
Our reading of this example is that reducing disruption depends on sequencing and a suitable specification, not simply choosing the fastest-curing coating. This was an external project reported by Sika, not a Resiluxo installation or an endorsement of our business.
Read Sika’s Merrion Centre case study
Fast curing is only one part of the programme
Flowcrete describes fast-curing MMA flooring for refurbishment and retail fit-outs. Its published curing figures concern particular products and conditions after application. They do not describe the total time needed to empty, prepare, repair, coat and reopen an existing space.
Explore Flowcrete’s fast-curing MMA systems
A useful brief for developers and property managers
Before requesting a programme, prepare the approximate floor area, drawings if available, photographs, existing floor information and the hours when access is essential. Identify ramps, exposed decks, loading zones, pedestrian routes and any known leaks or damaged areas.
Ask the proposed installer to distinguish preparation, repairs, application, pedestrian access and full vehicle use in the schedule. Also request the proposed system, its maintenance requirements and the assumptions behind the reopening date. A staged handover should make clear which areas can be used and when.
Designing the visual result
A restrained mineral palette can make a garage feel more coherent. For larger developments, colour can also help organise bays and routes. We suggest reviewing a physical finish sample alongside the lighting and proposed markings before agreeing the appearance. A concept image helps explore the design; it does not establish technical suitability.
Discuss a project in Marbella or the Costa del Sol
Resiluxo welcomes enquiries for private garages and larger developments. Share your location, approximate area, photographs and preferred access programme. Scope, delivery capacity and any specialist partners are confirmed for each project.
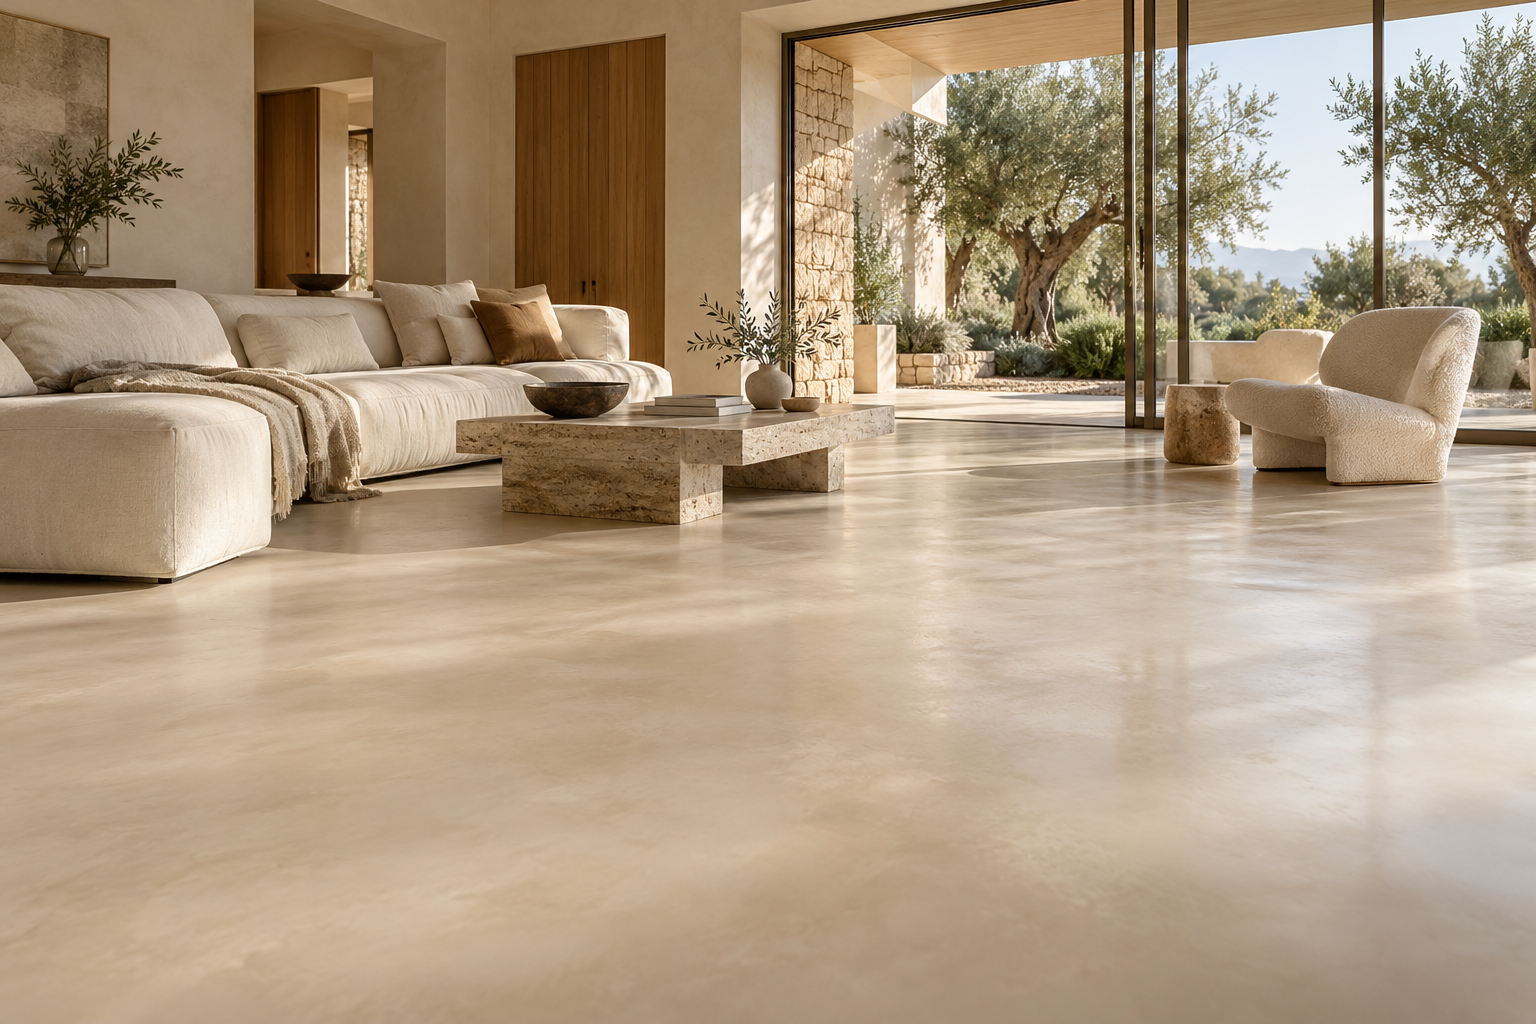
Resin Flooring in Marbella: A Practical Planning Guide
Planning a resin floor in Marbella or the Costa del Sol? Explore substrate preparation, natural light, finish, maintenance and the details to discuss before requesting a tailored proposal. Cover image: a Resiluxo design concept, not a completed installation.
A good resin floor begins with a clear brief. For a home, studio or commercial interior in Marbella or the Costa del Sol, the useful first questions are about the existing floor, the way the room is used and the finish you want to live with.
This guide helps you prepare a focused conversation before choosing a colour or requesting a quotation.
Start with the room, then the finish
Describe daily use: a quiet bedroom, a busy living space, a shop entrance and a kitchen ask different things of a floor. Note direct sunlight, doors to the garden, wet areas, pets and furniture that moves regularly. Tell your designer whether you prefer a calm mineral appearance or expressive, stone-inspired movement.
Bring a small selection of references rather than dozens of unrelated images. A physical sample, viewed beside your joinery, wall colour and fabrics, is more useful for a final decision than a screen image alone.
Assess the existing surface
Photographs are a starting point, not a substrate assessment. The proposed system needs a sound, properly prepared base. Existing coatings, contamination, loose material, cracks and moisture conditions can change the preparation required. Sika’s surface-preparation guidance treats substrate evaluation and preparation as central to resin-floor performance.
For an existing tiled floor, ask whether the tiles and their bond are suitable, how joints will be treated and what preparation or removal is included. Covering tiles should never be assumed possible from appearance alone.
Plan the edges and transitions
A continuous-looking finish still needs careful detailing. Review door clearances, skirtings, steps, thresholds and the transition to other materials. Ask which existing or movement joints must remain and how they will appear in the finished floor. Include underfloor heating, drains and bathroom details in the brief where relevant.
Discuss sunlight and wet areas explicitly
Rooms with large windows and spaces beside terraces deserve a specific conversation about exposure. Ask for the proposed system’s documented suitability for the location, including colour stability and any required topcoat. Do not assume that an interior decorative resin system is also suitable outdoors.
For wet areas, request a clear explanation of the complete build-up, waterproofing responsibility, drainage and the slip-performance specification for the intended use. A glossy appearance on its own does not tell you whether a floor is appropriate.
Build the programme around the selected system
Ask separately about preparation, application, access restrictions and return to full use. Manufacturer data sheets distinguish curing stages and show that temperature and humidity can affect timing. A universal promise such as “ready tomorrow” is not a sound basis for planning every project.
For a holiday home or managed property, identify who can provide access, when furniture can be removed, and who will receive the handover instructions. Coordinate the work with other trades before fixing a move-in date.
Compare the complete quotation
Check that each proposal explains the area measured, preparation, repairs, system build-up, finish, edges, protection, waste removal, exclusions and tax treatment. Ask how unforeseen substrate problems would be assessed and approved. Comparing only the headline price per square metre can hide important differences in scope.
Prepare your project brief
Property location and the rooms to be treated.
Approximate dimensions and clear photographs of the existing floor.
Known cracks, damp issues, previous coatings or loose tiles.
Two or three design references and a preferred level of sheen.
Access arrangements, target dates and whether the property will be occupied.
Resiluxo is based in Marbella and considers projects across the Costa del Sol. Send your project brief to begin the discussion, or explore our resin surfaces and view the design studies.
Technical reading: Sika surface-preparation guidance and an example Sikafloor product data sheet. These illustrate system-specific requirements; they do not specify a product for your project.
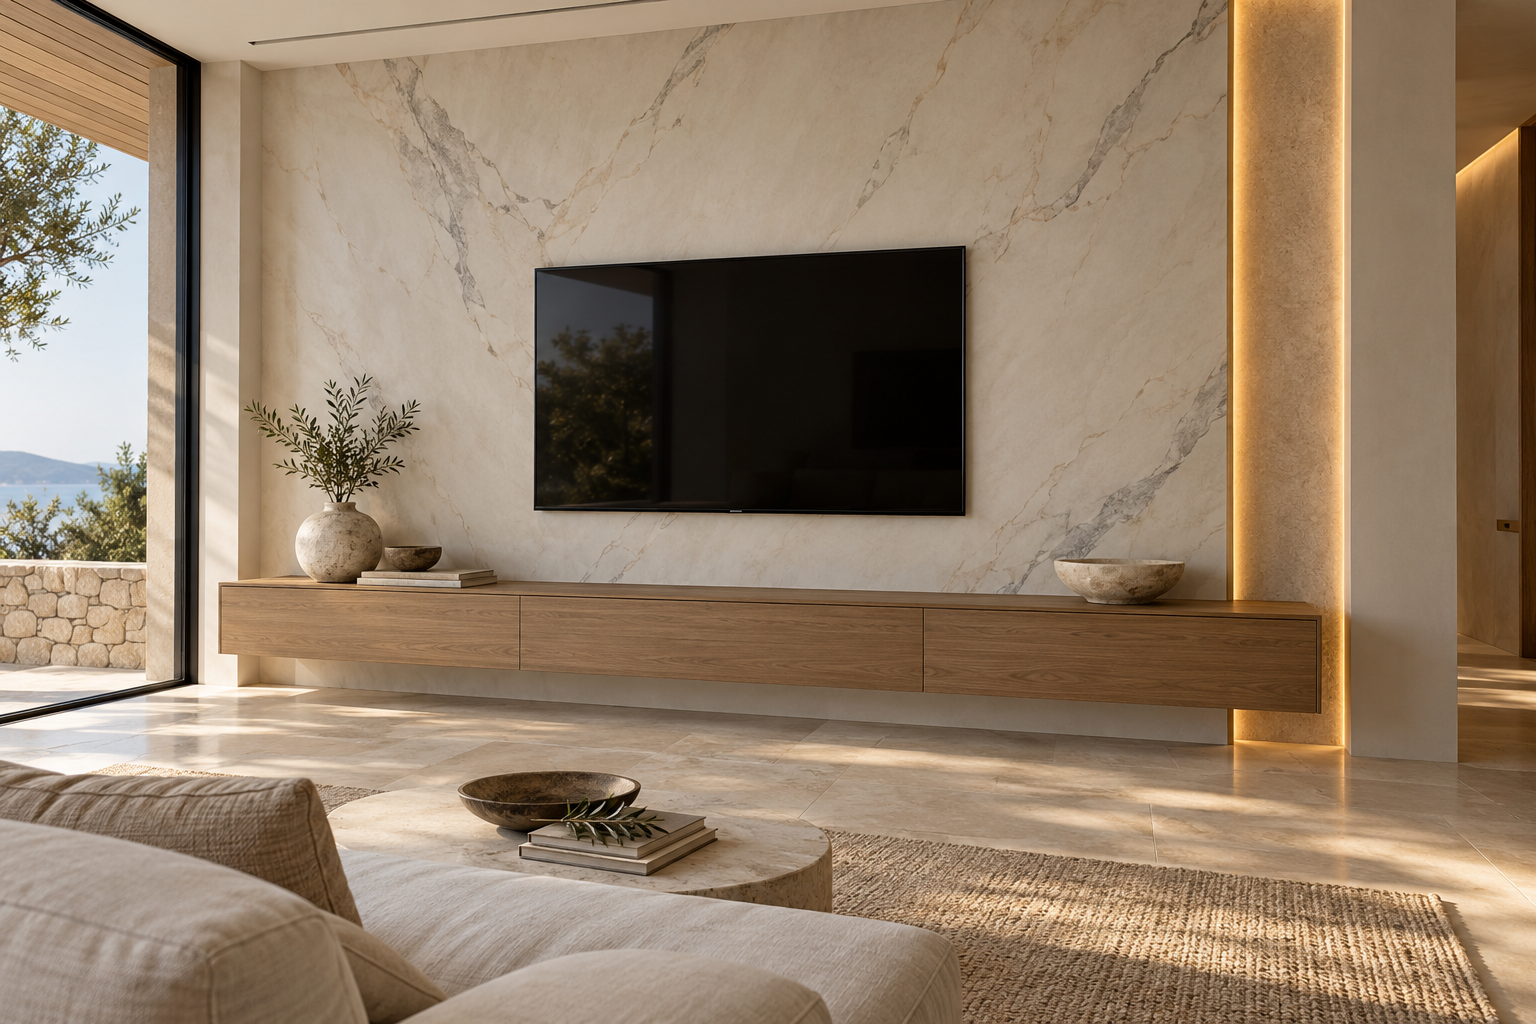
Resin TV Walls: A Design Guide for Contemporary Interiors
A considered guide to resin TV walls: proportions, marble effects, lighting, glare, substrate preparation and the details to plan before installation. Cover image: a Resiluxo design concept, not a completed installation.
A resin TV wall can turn a screen into part of a considered interior. The strongest result starts with the proportions of the room, then brings together surface texture, joinery and lighting.
Start with the whole wall
Measure the wall, screen and cabinet together. Decide whether the resin surface should fill the wall or sit within a framed panel. A quiet finish can suit a compact living room; a larger space may support a more expressive composition. Plan sockets, cable routes and access panels before fabrication begins.
Choose a visual direction
Soft stone effects sit naturally beside pale timber, linen and warm plaster. Dark veining creates a stronger focal point when the surrounding furniture remains restrained. For a bookmatched composition, approve the direction and scale of the pattern across the full wall, rather than judging it from a small sample alone.
Think about reflections
Gloss adds depth, but can reflect windows and lighting near the screen. Compare a sample under daylight and evening light from the main seating position. A satin or matte protective finish may be preferable where glare is a concern, depending on the selected coating system.
Plan the construction
Resin is a finish, not a substitute for a sound supporting wall. Assess the substrate, select a compatible primer and confirm how panels or coatings will be fixed. A television bracket needs suitable structural fixings; the decorative finish should not carry its load. Keep ventilation and access consistent with the equipment manufacturer’s instructions.
Coordinate lighting and materials
Review the sample beside the actual timber, stone and upholstery. Concealed lighting can reveal texture, but its position should be tested before installation. Design the transition to surrounding surfaces: a shadow gap, trim or clean junction should be intentional.
Care and long-term expectations
Ask for cleaning instructions for the exact topcoat. Use a soft cloth and an approved mild cleaner. Discuss sunlight exposure, repair options and the appearance of joints before choosing a system. Not every resin product is suitable for every wall or exposure condition.
Plan your resin TV wall
For a project in Marbella, the Costa del Sol or elsewhere in Spain, send Resiluxo a room photograph, wall dimensions, television size and material references. Include your location and whether the project is a renovation or new interior.
Explore our resin surface services or discuss your project with Resiluxo.
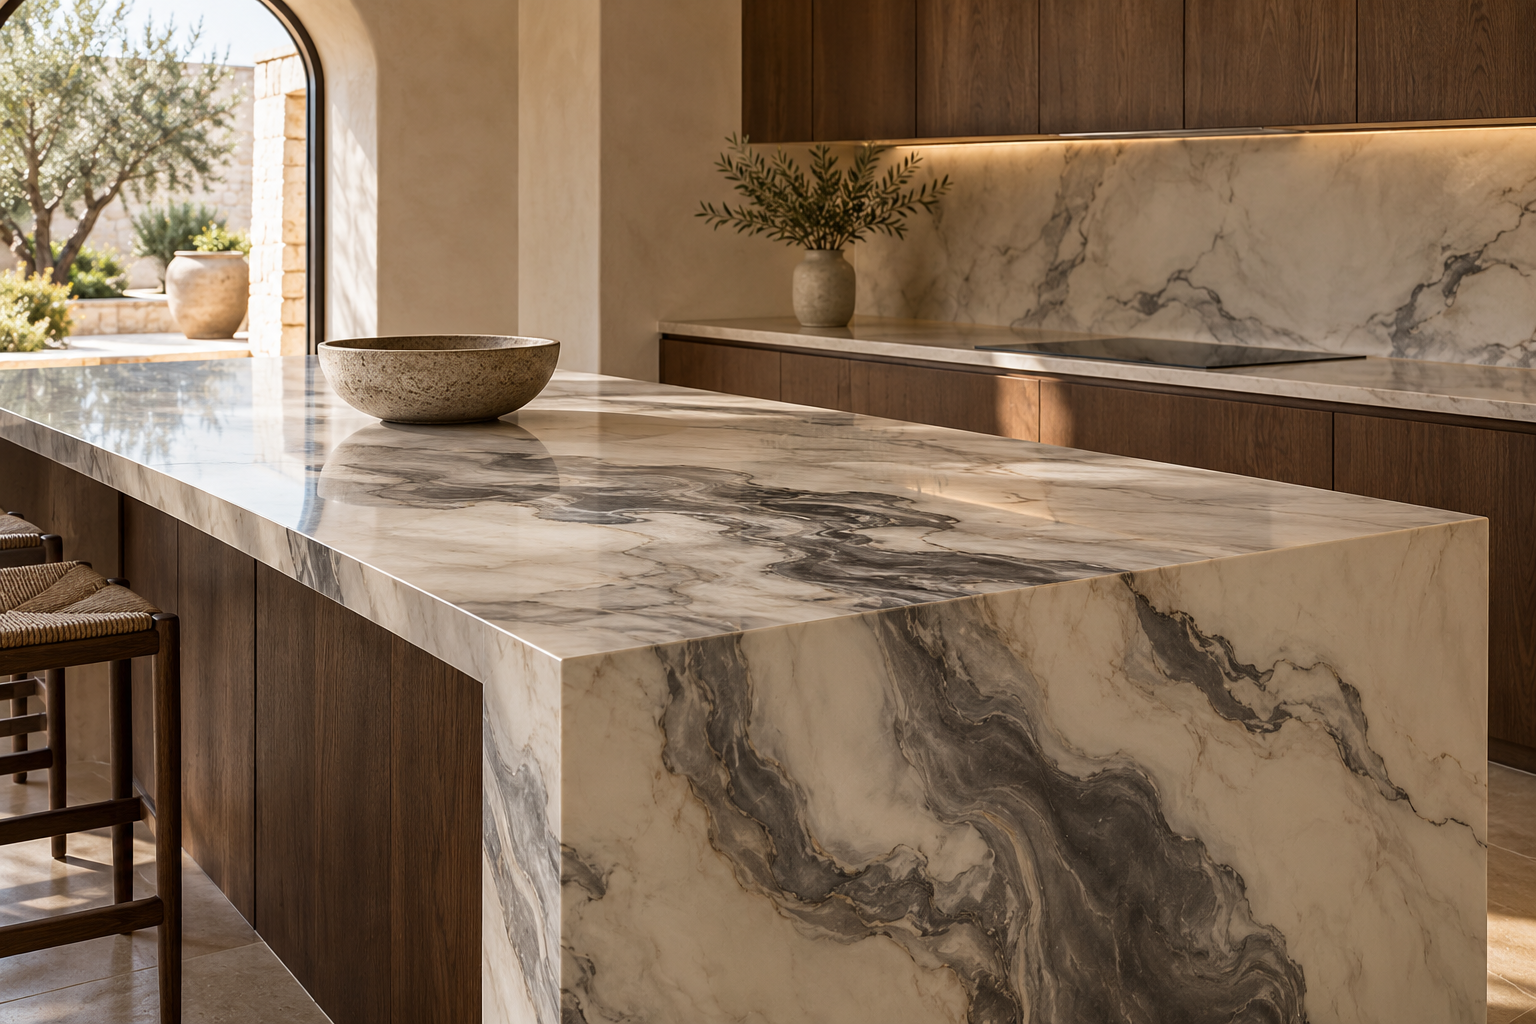
Resin Countertops: A Guide to Design, Preparation & Care
A considered guide to resin countertops: choosing a finish, assessing the existing surface, planning edges and sink details, comparing quotations and caring for daily use. Cover image: a Resiluxo design concept, not a completed installation.
A countertop is both a working surface and a prominent part of an interior. A resin finish offers scope to explore colour, movement and sheen, but the proposal should begin with the existing surface and the way the room is used.
Begin with the room, not the pattern
Consider the cabinetry, flooring, wall colours and daylight together. A quiet cream composition can soften a kitchen; a more expressive vein can give an island a clear focal point. Review a physical sample in the room before agreeing the finish.
Assess the existing countertop
Before specifying an overlay, ask for an assessment of the base material, stability, joints, edges and areas around sinks and appliances. Agree which repairs, preparation and removals are included. An attractive coating is not a substitute for a sound base.
Plan the details
Discuss edge profiles, splashbacks, sink junctions, taps and appliance clearances as part of one design. Ask how existing joints will be treated and where a visible joint or seal may remain. A continuous visual effect should not be confused with a promise to eliminate every joint.
Choose performance for everyday use
Request the technical and care guidance for the exact resin and protective finish proposed. Confirm suitability for the intended kitchen or bathroom use, including any food-contact requirements, rather than relying on the word resin alone.
Use a cutting board and protection under hot cookware. Follow the selected system’s cleaning instructions; avoid abrasive pads and unapproved chemicals. Manufacturer guidance also distinguishes initial handling from full cure, so agree when the surface can return to normal use.
Compare complete renovation proposals
Compare preparation, repairs, finish, edge work, plumbing adjustments, protection and aftercare—not just the coating price. Ask for an installation programme and a separate return-to-use date. There is no single price or schedule appropriate to every countertop.
Consider what can be retained
Ask whether the existing countertop can be retained and what would need replacing. Assess environmental claims against the products and scope actually proposed; a resin finish alone does not establish a lower-impact renovation.
Start with your space
Send photographs, approximate dimensions, your location and the finish you have in mind. Include close-ups of edges, joints and any damaged areas so we can discuss the next assessment step.
Explore our surface services · Discuss your countertop
Further reading: manufacturer countertop care guidance. This is an example of product-specific guidance, not a specification of the system for your project.